

In partnership with

People are charging thousands of dollars to create 3D models—and honestly, it makes sense. It takes time, effort, and a lot of patience. But guess what? Times have changed.
What used to take days or weeks can now be done in minutes.
Thanks to Meshy AI, you don’t need to be a pro or burn through your wallet to get stunning 3D designs.
In this review, I’ll show you how Meshy AI is flipping the script.
Ready to stop overpaying and start creating smarter? Let’s get into it.
Today’s Lineup:
Steps by Step to create your first 3d model
Integration with 3d Software
Alternatives
Pricing
Why This Matters
Try inFlow Free—$499 Off for a Limited Time

Get started for free and see how simple inventory management can be.
inFlow helps you stay on top of inventory, track costs with precision, and protect your bottom line.
You’ll always know how much you’re spending, what you’re making, and where you can save.
It also simplifies inventory, orders, shipping, and barcode scanning in one easy-to-use system—rated “easy to use” by 93% of users.
Rated 4.6 stars across 500+ reviews on Capterra and named a top pick in multiple competitive comparisons
inFlow connects with Shopify, Amazon, QuickBooks, UPS, and 90+ other tools, so everything works together without the manual work.
Try it free and, for a limited time, save $499 when you upgrade with code EASY499.
An inFlow specialist can show you how to simplify inventory from day one
✅ See how others are navigating change in our case studies
🚀 Compare plans on our pricing page
Step By Step to Create your first 3d Model
Step 1: Create a Meshy AI Account
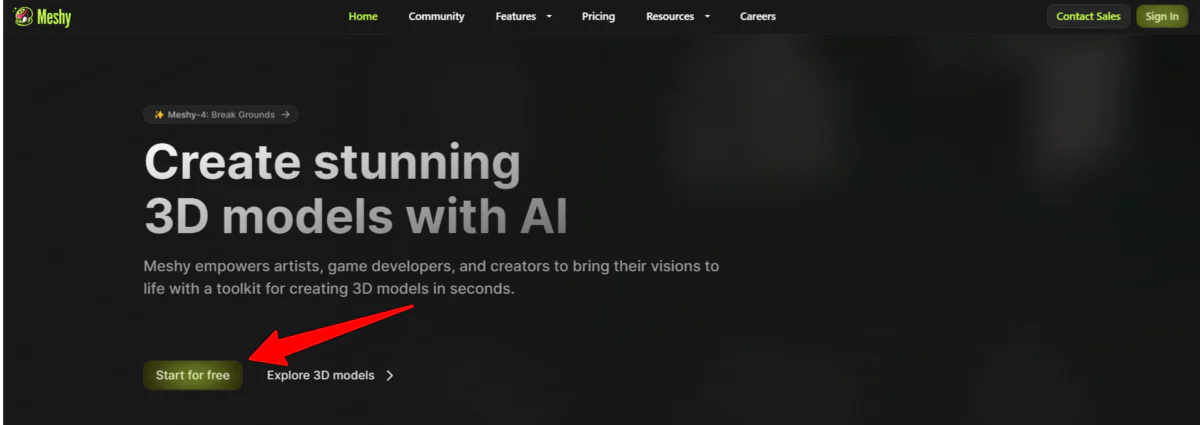
I started by going to meshy.ai (←click here to visit)
Select “Start for free.”
Step 2: Select “Text to 3D”

After creating an account, Meshy granted me a 3-day free trial of all the premium features! I was taken to my Meshy dashboard and selected “Text to 3D.”
Step 3: Add a Text Prompt

The first thing you need to do is add a text prompt. Prompt engineering in Meshy is absolutely crucial. If you need help with prompt engineering, check out Meshy's official prompt guidelines!
Here's my formula for writing effective prompts:
Start with the basic object type
Add specific material details
Include style keywords
Specify any unique features
Add technical requirements if needed
Here's a real example that works great:
“Modern dining chair, matte black powder-coated steel frame, cognac leather upholstery, minimalist design, ergonomic back support, suitable for commercial use”
I added this text prompt to the empty field.
Step 4: Choose the AI Model & Art Style

For the AI Model, I went with Meshy's latest version: “Meshy-4.” I also chose “Realistic” as the art style.
Step 5: Choose the Target Polycount & Generation Detail

For the Target Polycount, I had two options:
Adaptive: Automatically sets the target polycount based on the model's structure.
Fixed: Maintains a constant target polycount, regardless of the model's structure.
I kept this on “Adaptive” and the generation detail on “High.”4
Step 6: Choose the Topology & Symmet

Next, I chose my Topology. There were two to choose from:
Quad: Create evenly distributed quad faces for editing, with lower detail at a set polycount.
Triangle: Produce optimized triangle faces tailored for game engines, enhancing detail at a given polycount. This option is more challenging to edit.
I selected “Quad” and kept the Symmetry on “Auto.” From there, I hit “Generate!”
Step 7: Generate!

About a minute later, Meshy AI generated four models that matched what I was envisioning!
I selected the model I liked most to preview it in the far right panel. Beneath my selected model, I hit “Texture” to add a texture!
Step 8: Add a Texture

Immediately, Meshy began generating a texture! Once my texture was generated, I selected it to apply to my chair.
I was impressed by how realistic it looked and was happy that it matched my exact prompt description! Feel free to use the AI editing tools on the right to edit your texture and apply an animation.
Step 9: Download

Once you're satisfied with your creation, hit the download icon.
The “Download Settings” window will appear where you can choose the mesh optimization setting (decreases the amount of triangles in the model for better performance).
You can also resize the model to real-world dimensions, and choose the height, origin, and format.
Here are the formats you can export your model in:
fbx
obj
gib
usdz
stl
blend
Overall, Meshy AI made creating a realistic 3D model of a modern dining chair quick and easy! The steps were easy to follow and the customizable options gave me full control to create a high-quality model in minutes.
5 Tips for Prompt Engineering in Meshy AI
Sometimes things generated on Meshy don't work quite right. If you're getting weird results, try:
Breaking down complex objects into simpler parts
Being more specific about materials
Using different synonyms for key terms
Adjusting the complexity settings
Meshy AI processes colors in a pretty specific way. Instead of saying “blue,” try using more specific terms like “navy blue” or “cobalt blue.” The results are usually much closer to what you're imagining.
Integration With Other than 3d Models
You can use Meshy AI models in the following 3D software:
A dedicated plugin for Blender (it's free and great for tweaking)
Maya
Unreal Engine
SketchUp
Rhino
Visit their public library and 3d Templates to get started. Trust me it’s amazing and worth trying
Top 3 alternatives_
Appy Pie
“3D for Dummies”
Appy Pie turns your doodles into 3D magic. It’s like Photoshop had a baby with AI—but for beginners. If Meshy AI is the pro chef, Appy Pie is the microwave dinner: fast, easy, and gets the job done.
Meshy AI: For serious creators who want pro-level results.
Appy Pie: For those who don’t want to read a manual.
Verdict: Want to impress clients? Stick with Meshy. Need a model before your coffee gets cold? Appy Pie it is.
Spline
“3D meets Google Docs”
Spline is like Meshy AI’s artsy cousin who works in tech. It’s all about collaboration and making cool interactive designs. Great for web stuff, but don’t expect blockbuster-level models.
Meshy AI: Pro-quality models, faster than a pizza delivery.
Spline: Fun, interactive, but maybe not ready for Hollywood.
Verdict: Need textures that’ll make your models pop? Go Meshy. Want to mess around with your team in real-time? Spline’s your jam.
Masterpiece Studio
“VR for the Lazy Genius”
Masterpiece Studio is like designing in The Matrix. It’s perfect for people who want to feel like creative gods without actually learning 3D design. VR goggles optional, ego boost included.
Meshy AI: For polished, production-ready designs.
Masterpiece Studio: For “look what I made in VR!” moments.
Verdict: Want pro results? Meshy. Want to feel like Iron Man? Masterpiece it.
Pick your tool and start creating!
Or don’t—Meshy AI will still do it faster. 😃

Gif
What’s the pricing?
Meshy AI offers a free plan with 200 credits. Alternatively, you can get a 3-day free trial of the Pro plan to explore the premium features.

Feedback Time
Your Opinion Matters -
We’d love to hear your thoughts on today’s deep dive into Meshy AI
So, start experimenting and make your first 3d art.
SEND US BY REPLYING TO THIS EMAIL, and we will share the best one in Saturday’s edition.

Gif by losvagosnft on Giphy
Wrapping Up the day!
Until next time,
Your AI Case Study Team
P.S. If you actually like this newsletter, let us know. If you don’t, we’re not going to cry about it. You know where the door is.
Just kidding guys …. 😁 Help us with your feedback.
Partner with us.
Want to Feature your tool in front of 4700+ AI & tech lovers?
Partner with us
Follow me on Linkedin
Check this Link
